Composting is a fun and easy way to recycle and help the environment while building soil fertility and supporting the soil food web. In this ultimate guide, we will provide an in-depth look at how to make your own compost step by step. You don’t have to be an expert to do it, and you’ll be helping the Earth while having a great time!
Part 1: Understanding Composting and the Soil Food Web
Composting is the process of breaking down organic materials, such as kitchen scraps and yard waste, into nutrient-rich humus that can be added back into the soil.
This process is facilitated by a diverse group of microorganisms, including bacteria, fungi, and other tiny creatures that make up the soil food web. By supporting the soil food web, composting contributes to improved soil fertility, better water retention, and healthier plants.
Benefits of composting:
- Reduces landfill waste
- Enhances soil fertility
- Helps retain moisture in the soil
- Supports beneficial microorganisms
- Reduces the need for chemical fertilizers
- Encourages strong, healthy plant growth
Part 2: Gathering Your Materials
To create a successful compost pile, you’ll need both “green” and “brown” materials. These materials will help create a healthy environment for the soil food web, which includes bacteria, fungi, and other tiny organisms that help make the soil fertile.
Green materials (nitrogen-rich):
- Grass clippings
- Green weeds
- Pea vines
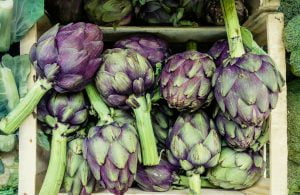
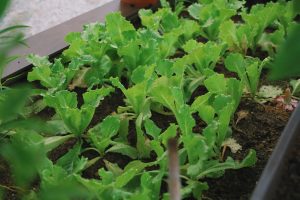
- Lettuce leaves
- Vegetable scraps
- Coffee grounds
- Fruit scraps
Brown materials (carbon-rich):
- Dry leaves
- Small twigs
- Straw
- Cardboard
- Newspaper (non-glossy)
- Wood chips
- Sawdust
Aim for a 1:2 ratio of green to brown materials to create a balanced compost that supports the soil food web. Avoid using materials that could introduce harmful pathogens, chemicals, or pests, such as meat, dairy products, pet waste, or chemically treated wood.
Part 3: Choosing a Composting Method
There are several composting methods to choose from, depending on your available space, materials, and preferences.
Heap or pile: This is the simplest method, where materials are layered directly on the ground or in a designated area. This method requires regular turning to maintain aeration with a minium size of 3×3 to start the composting process
Bin or container: Composting in a bin or container helps keep the materials contained and can be more aesthetically pleasing. Bins can be purchased or built using wood, wire mesh, or plastic.
Tumbler: A compost tumbler is a rotating container that makes turning the compost easy. Tumblers can help speed up the composting process, but may be more expensive than other methods.
Vermicomposting: This method uses worms (typically red wigglers) to break down organic materials. Vermicomposting can be done indoors or outdoors and produces nutrient-rich worm castings in addition to compost.
- Black Soldier Fly Larvae: Another effective composting method involves using black soldier fly larvae (BSFL) to break down organic waste. BSFL composting rapidly decomposes waste, produces nutrient-rich compost called frass, and can even process materials like meat and dairy that are not suitable for traditional composting. To set up a BSFL composting system, choose a suitable container, add waste materials, introduce BSFL, and regularly maintain the system by adding fresh waste. This method also helps reduce odors and pests associated with decomposing waste, making it an eco-friendly and efficient composting option.
Choose the method that best fits your needs and available resources.
Part 4: Creating and Maintaining Your Compost Pile
Once you’ve chosen a composting method, follow these steps to create and maintain your compost pile:
Start by layering 4-6 inches of brown materials, followed by 2-3 inches of green materials. Add a layer of garden soil or compost (1-2 inches) to introduce beneficial bacteria and fungi. Continue layering brown and green materials with soil or compost in between until the pile is 3-4 feet tall. This will create an environment for the soil food web to thrive.
Monitor the moisture level of your compost pile. It should be damp, like a wrung-out sponge. If the pile is too dry, add water. If it’s too wet, add more brown materials to absorb excess moisture. Aim to maintain a consistent moisture level throughout the pile.
Turn the pile regularly (every 1-2 weeks) to introduce air and maintain aeration, which helps the bacteria and fungi do their work. Use a pitchfork or shovel to mix the materials, bringing the outer parts to the center and the center to the outside.
Monitor the temperature of the pile with a compost thermometer. A well-maintained compost pile will heat up as the microorganisms break down the materials. Aim for a temperature of 130-150°F (55-65°C) for optimal decomposition. Turning the pile can help regulate the temperature if it gets too hot or cools down too much.
As the materials break down, the pile will shrink in size. Continue adding new materials in layers to keep the composting process active.
Part 5: Troubleshooting Common Composting Issues
Here are some common composting issues and their solutions:
Foul smell: If your compost pile has an unpleasant odor, it may be too wet or have too many green materials. Add more brown materials and turn the pile to improve aeration.
Slow decomposition: If the pile is not breaking down quickly, it may be too dry, lack nitrogen, or have insufficient aeration. Add water, green materials, and turn the pile more frequently to speed up the process.
Pests: To discourage pests such as rodents, avoid adding meat, dairy, or oily foods to your compost pile. Use a bin or container with a lid and a small opening to prevent pests from accessing the compost.
Uneven decomposition: If some parts of the pile are decomposed while others are not, it may be due to inconsistent moisture or aeration. Turn the pile more frequently and ensure even moisture throughout.
Part 6: Harvesting and Using Your Compost
After a few months, your compost pile will have turned into a dark, crumbly, and sweet-smelling material called humus. This is your finished compost! To check if it’s ready, the compost should look and smell like rich, dark soil.
To harvest your compost, remove the finished compost from the bottom and sides of the pile, leaving the unprocessed materials behind. You can use the finished compost in various ways:
- Garden fertilizer: Mix the compost into your garden soil to improve fertility and support plant growth.
- Potting mix: Combine compost with other materials such as peat moss, vermiculite, or perlite to create a nutrient-rich potting mix for containers or seed starting.
- Mulch: Spread a layer of compost around the base of plants or trees to help retain moisture, suppress weeds, and provide nutrients.
- Lawn topdressing: Apply a thin layer of compost to your lawn to improve soil fertility and promote healthy grass growth.
Conclusion:
By following this ultimate guide to composting, you’ll be supporting the soil food web and building soil fertility in your garden. Composting is an enjoyable and rewarding way to help the environment and contribute to the cycle of life. Get started today and experience the benefits of composting for yourself. Happy composting!